It’s beginning to look a lot like a Mickey holiday season at my home! However, pink + mickey + Christmas has been impossible to find in stores. So, what do you do when you can’t find what you’re looking for? You DIY it, of course.
This is a little time consuming, but super easy. What takes the longest is literally just waiting for wet paint to dry. You can also make these with any pre-colored shatter proof plastic ornaments, I was just looking for a specific color scheme that I wasn’t able to find in stores, so I needed to paint my own.
Here’s what you’ll need:
(To paint your own)
- Clear plastic crafting ornaments in two sizes. (Big size for the “head” and smaller for the “ears”
- Acrylic paints in your color choices
- Dixie cups (to drip and dry paint) or a paper bag and a paper towel roll center cut into sections works as well.
- Electric drill
- Drill bit (the size of the small ornaments opening)
Next, pour your paint into the ornament. The more you pour in, the easier it will be to cover it inside.
Swirl your ornament until it is fully painted on the inside. Then, pour out as much as you can back into the paint container or into a Dixie cup.
Set your ornament upside down for a few hours on a clean Dixie cup so that all of the excess paint will drip out. Then, turn right side up (with the hole facing up) overnight to allow the paint to fully dry.
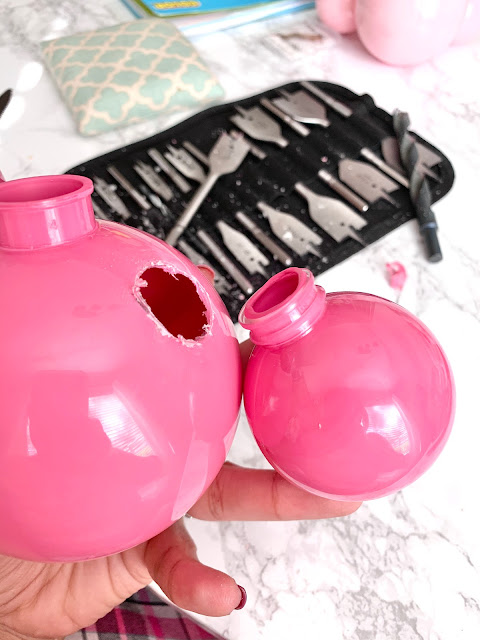
Mark your ornaments about an inch down from the top hole. To make sure they’re symetrical, i made sure to use the seam line as reference. If you’re more comfortable having your ornament on a vice, I’d say do that because honestly, I thought there was gonna be blood, but it ended up being very easy and no accidents. You have to be gentle because the plastic will collapse in if you apply too much pressure. Because the ornament is a sphere, you have to keep adding pressure on all sides or keep turning as you drill to make sure it cuts out evenly.
NOTE: I added a video to my IG Highlights under DIY of how I drilled the holes.
Once you cut through the ornament, you should be able to just pop the small ornaments in. No glueing required!
NOTE: I added a video to my IG Highlights under DIY of how I drilled the holes.
Once you cut through the ornament, you should be able to just pop the small ornaments in. No glueing required!
After you pop the small ornaments in, all you have to do is put the hanger back on the large (middle) ornament, and VOILA! That's it! I hope I see some of y'all make this craft and make it your own, if you do, please share!!


Girl you are so talented ❤️✨
ReplyDelete