

I don't have any photos of my own first birthday, so although we don't have any friends and family here to invite over, I still wanted to make her birthday memorable enough to get her some good photos for her baby album. So of course, I became OBSESSED with making her a pinata. I looked online and there was no way I was going to pay $100 for a pre made one. I mean...it's just paper!
And a few other things:
Materials
Materials
- Cardboard
- Glue sticks
- 2-3 Party streamer rolls
- Wire hanger (for hook)
- Tape (I used packing tape)
Tools
- Glue gun
- Sewing machine
- Box cutter
- Scissors
Well, since we used to place a ridiculously large amount of online orders (mainly formula, and baby stuff) we had plenty of cardboard boxes for the pinata base. I realized that a flamingo is really just made up of lots of circles and used a basic string and pen makeshift compass to draw them and shape out the flamingo. I used a box cutter to cut out the shape and then traced it onto another piece of cardboard so that I have two identical flamingo outlines.
Note: I had to use 2 pieces to create the head and just taped them together. It's okay if you have to do that. Once it's covered, you can't notice it. Just make sure the pieces overlap where you tape them.


Then, following the grain of the cardboard (where you see the lines or ripples) cut out lots of strips in the width you'd like your pinata to be. I used my 3" ruler and a box cutter for this. These strips are going to be taped all around the pinata, so you'll need that much.
I taped the 3 inch strips all the way around the outside of my pattern and then placed the second piece on top and taped that up too.
I made sure to leave a flap opening on top for the candy to go into, as well as an overlapping flap "door" on the bottom. Since my baby girl would not be hitting the pinata, I decided to make a door that would open with a ribbon when pulled.


Once the pinata shape is all taped together, I went on to sewing my streamer. I didn't like how flat the streamer was, so I decided to run it through my sewing machine with a basic stitch to pleat it. All you have to do is mess with your tension a little and run it through a straight stitch and the paper will pleat as loose or as tight as you'd like.


I did this for 3 rolls of streamer paper. I also decided to fold the streamer in half just so I could have lots of small ruffle layers.
Once the paper was done, it was just a matter of gluing it on. If I had to do it again, I would glue the sides first so that the edges would be better hidden, but I began on the main body, so I just followed that through. I used a glue gun for this.


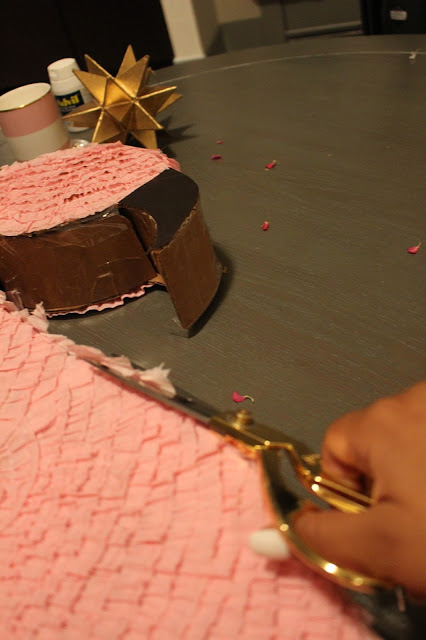
After gluing on the paper it's all a matter of cleaning up the edges. I just cut the edges with scissors. I ran out of crepe paper and covered a few discrete parts with basic craft paper. I also cut the eyes and beak out of basic craft paper and glued that on.
My last step was making the pull door thing on the bottom so for the candy to drop. I ran out of supplies and patience and will to live by this point and just painted the bottom of the pinata.


Note: I had to use 2 pieces to create the head and just taped them together. It's okay if you have to do that. Once it's covered, you can't notice it. Just make sure the pieces overlap where you tape them.


Then, following the grain of the cardboard (where you see the lines or ripples) cut out lots of strips in the width you'd like your pinata to be. I used my 3" ruler and a box cutter for this. These strips are going to be taped all around the pinata, so you'll need that much.
I taped the 3 inch strips all the way around the outside of my pattern and then placed the second piece on top and taped that up too.
I made sure to leave a flap opening on top for the candy to go into, as well as an overlapping flap "door" on the bottom. Since my baby girl would not be hitting the pinata, I decided to make a door that would open with a ribbon when pulled.


Once the pinata shape is all taped together, I went on to sewing my streamer. I didn't like how flat the streamer was, so I decided to run it through my sewing machine with a basic stitch to pleat it. All you have to do is mess with your tension a little and run it through a straight stitch and the paper will pleat as loose or as tight as you'd like.


I did this for 3 rolls of streamer paper. I also decided to fold the streamer in half just so I could have lots of small ruffle layers.
Once the paper was done, it was just a matter of gluing it on. If I had to do it again, I would glue the sides first so that the edges would be better hidden, but I began on the main body, so I just followed that through. I used a glue gun for this.
 |
| Quick tip: Use a silicone mat under your glue gun for easy clean up! |


After gluing on the paper it's all a matter of cleaning up the edges. I just cut the edges with scissors. I ran out of crepe paper and covered a few discrete parts with basic craft paper. I also cut the eyes and beak out of basic craft paper and glued that on.
My last step was making the pull door thing on the bottom so for the candy to drop. I ran out of supplies and patience and will to live by this point and just painted the bottom of the pinata.


In the end I absolutely loved the pinata! She's the prettiest pink flamingo pinata I ever saw and totally worth the 2 weeks it took me to make it.
