Friday, May 20, 2016

DIY Gold Sea Urchins...

I keep seeing these super cute golden sea urchins all over the place and I LOVE them. I'm sure you've seen them too. Well, I ran into them while shopping at Target last week and I quickly threw two packages of them in my cart when I thought...What am I doing? They're golden sticks for $15 a pack and they're not even very big (Also, I thought about what my other half would say when I came home with these after he just finished telling me we need to watch our spending. Haha!).Well, I snapped a picture, put them back, and put the gears to work in my head. I spent a few bucks on skewers and gold paint,, and made a trip to the dollar store, because I KNEW I had seen styrofoam balls there before and I KNEW they were much much more at Michaels. 


Well I got home and googled "Gold Sea Urchin" and what the heck? I saw some selling for up to $180!! So now, I'm a little more excited for this project. The pricier the knock off that I can pull off, the happier it makes me! Well,, I also saw that there are several tutorials out there to replicate the urchins, but they were all missing something. THE DARK CENTER! Well...I didn't buy any black paint. I did have some black watercolors, so I decided to just use what I had at home.  I apologize for the photo quality of some of these. I was working on this late at night after the baby went to bed...and after a few glasses of wine.

Materials:

  • Pkg of skewers
  • Small styrofoam balls (or half spheres)
  • Gold and black paint
  • Sponge brushes
  • Glue gun and glue sticks


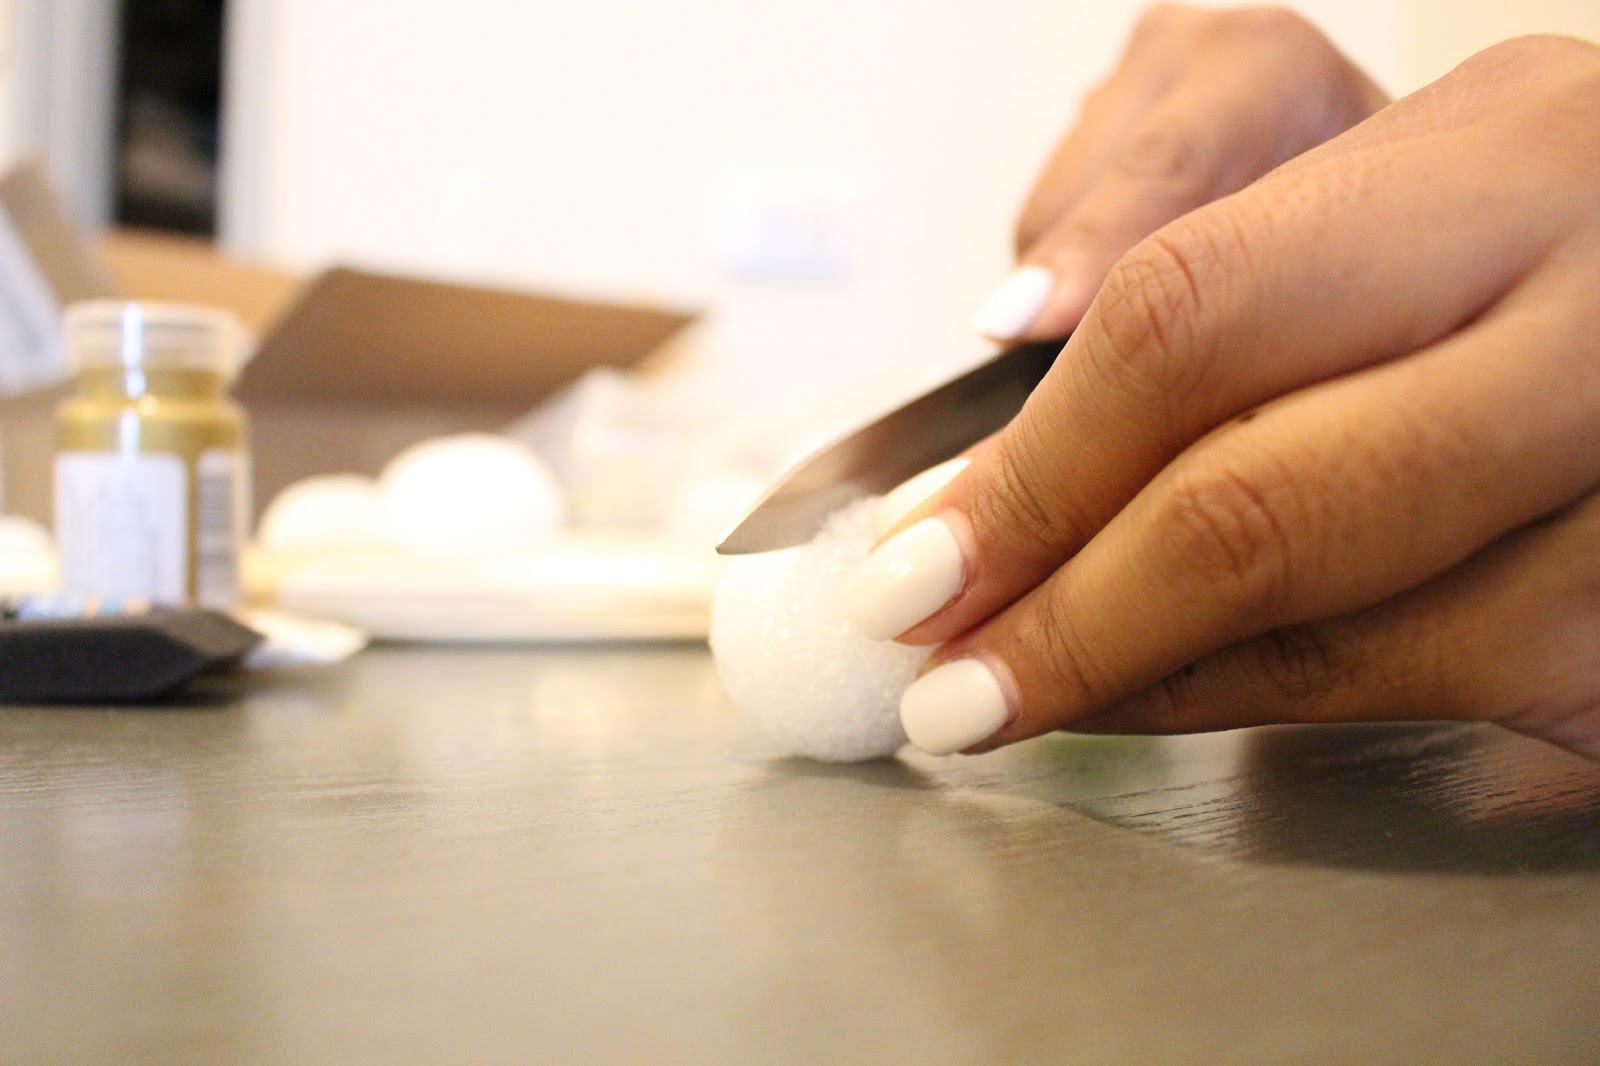
This is the perfect size sphere. If you get the half spheres, you're ready for the next step. If not, cut your sphere in half.


Next, paint your half sphere black. It doesn't have to be perfect, you'll barely see it when your're done but you don't want to see a bright white center. You want it to just dissapear. 
-Woopsie, I forgot to take a photo of this step, so I took it from my snapchat (@jaaaamazing). 


Start cutting your skewers. I cut them to a little over 4". The small overage is the point that's going to be stuck in the half sphere. I actually just layed them all down in a straight line and took a colored pencil and drew a straight line across so that each skewer got a tiny measurement notch. I scored each skewer at the notch and then just snapped them all to size. It was kind of annoying to cut each skewer and then go chasing after the part that flew off. So I found this to be easier.


You're going to want to paint the pointy skewer black about 1/3 of the way and let dry.


After they are all painted black and dry, begin painting the other side gold. You're going to want to overlap the gold paint onto the black a little bit to create a fade effect.


Once the first coat was done and dry, I felt like mine weren't gold enough and I took all the skewers off my drying styrofoam and gave them one more coat. (Whenever we order something that comes with a good piece of styrofoam I stash it away for occasions like this! Errol thinks I'm crazy but HA!! It worked for this project IN.YOUR.FACE! LOL)


Now you want to have your black half sphere and skewers ready.


I laid my glue gun on its side and just allowed the glue to melt onto a paper towel where I could just dip the tip of the skewer into and then insert it into the half sphere.


This is the part of the tutorial where you want to be very careful to equally space the skewers or else it's not going to look like the original ones. Place them very close together but with an even sunburst v shape beginning at the bottom of the sphere. 

 I did see a few tutorials where they used toothpicks or chop sticks and I just  didn't like the effect as much as I liked the skewers. They're much more close to the real ones. 


On the next row up, make sure to place the skewer between the gap of the lower skewer to give it that random (but not random) sunburst effect.


Continue to alternate the order of the skewers as you move on to the next row. Once you're done, you can go back and fill in any gaps but make sure you don't overdo it or you'll crack your sphere...like I did. 


If this happens, just flood it with hot glue and cut out a paper circle that's the same size. I just happened to have this laying around. (I think it's the packaging to some macarons I bought. Haha! I keep a lot of junk for "just in case") 


THAT'S IT! You're done and you have a beautiful gold sea urchin decoration! You can hot glue a little loop to the back of it and hang it on your wall or just use it as surface decor. I think I'm going to put it up on my wall but we move A LOT, so I'm just going to attach some 3M strips to the back of it. That's how I attach EVERYTHING to my walls. I like to switch up my decor so much anyways and those work perfectly for people who change their minds as much as I do.

If I missed anything or if you have any questions, I'd be happy to answer. I'd love to see how yours turn out!

My Version $4!!

zincdoor.com $147-197.50

Target $14.99

Monday, May 16, 2016

cruising...

I turned the big 3-0!!! Again. Haha! For my 30th birthday last year I was very pregnant and very lazy, fatigued, tired and really didn't want to do anything. So my other half decided that we were going to celebrate my 30th birthday again this year and we were going to go BIG! So cake and ice cream was just not going to cut it. A 7 day cruise? YES!

We sailed to Jamaica, Grand Cayman, and Mexico. It was a wonderful vacation to focus on us and our relationship and I just wanted to share a few photos of the trip, but mainly a few photos of my favorite swimsuit.

I literally tried on over 30 bathing suits and it's so difficult to find one to fit my body type. I learned a long time ago how to dress for my body type. Mainly from Stacy London and Clinton Kelly. Their biggest piece of advice and what's always imprinted in my head has been to dress the biggest part of your body and everything else can be tailored. Luckily for me. I can sew! However, sewing a bathing suit, is not very easy, so I'd rather just purchase a good one. That task was easier said than done.

I tried on bathing suits ranging from $20 to $550 and the lucky winner was the $20 suit from Forever 21 that you can get HERE. It's not too "young" looking, it's modest (for a two piece), and it's mommy appropriate. I've always dressed modestly although I did like to show cleavage from time to time, but now that I'm a mom, I just don't feel as comfortable in some clothes. I think it's just about my own personal level of appropriateness. 


Thursday, May 12, 2016

fave fashion blogger, the look for less...

One of my favorite bloggers out there Is Rachel Parcell of Pink Peonies. I absolutely love how classy, sophisticated, modest, but modern her style is.What I don't like? The prices of everything she loves(WAHHHHH!). Although some of the items she names as "affordable", I'd say... NOT TO ME! Yes, I'm able to save up and splurge on a few things now and then, or sometimes my love will surprise me with a nice gift. However... I am but a mere mortal. I'm a normal person. Those types of purchases are not realistic. For those of us on a SUPER extreme budge AND/OR us curvy girls who can't seem to find her style in bigger sizes. Here is a small list of how to get the look of some of my Pink Peony favorites, on a budget! I mean, just cause I don't have a great financial situation doesn't mean I can't look cute, right? Obviously quality and materials are not the same. I'm not insinuating that they are equal matches. I just want to look like a Pretty Peony too!

Pink Peonies


I'll start with a few faves from her most recent post which you can see here.

Being a plus size gal, I have always struggled with finding cute jeans (or any pants for that matter) in my size. Also, I've always lived paycheck to paycheck so even if I could find jeans I like, they were way too pricey for me. Then came Target and Forever 21 Plus. Thank goodness! 
AG- 'The legging' ankle jeans VS Target- Women's Low Rise Skinny Jean 


I love cheap sunnies! Especially when they're "trendy". I lose glasses like crazy OR my lovely little girl has got them in her mouth. I own a pair of RayBan Aviators, Wayfarers, and a cute Kate Spade pair. Other than that, Forever 21 is my go to sunglasses spot!
Karen Walker VS Forever 21


I own a few Target watches and my priciest watch is a rose gold Kate Spade watch that was a Christmas gift from my other half. I don't find that spending money on a watch is a good investment for me. I look at my cell phone for the time and honestly, 99% of the time that I'm wearing a watch, it's not even set to the correct time!
MICHELLE' VS Target- Peugeot


rag & bone VS Forever 21
I would seldomly wear this bag. Green is actually one of my least favorite colors, but every once in a while I think this Target swap would work!
3.1 Phillip Lim VS Target- Merona

From her very own clothing line there is this beautiful pink lace skirt. I actually would have splurged on hers just to support her (and because it's beautiful), but I ended up finding this skirt about two weeks before she released her line. The photo from JCP doesn't to the skirt justice. It's longer than the photo shows and is more closely in color to the splurge.
Rach Parcell VS JCPenney
I'm obsessed with this neckline! Not an exact match to the dress, but it's the neckline I was really in love with!

Asos VS Target
"I saw Cady Heron wearing army pants and flip flops, so I got army pants and flip flops." But really, I never even entertained the idea of fitting my big booty, messy eater self into a pair of white jeans... until I saw Rach wearing them. Then I was OBSESSED. This pair from Forever 21 is AMAZING. They stretch, fit great, don't show your butt when you sit down, I don't feel like my gut is hanging out, and you can't see what color underwear you're wearing. I've worn black under them and NOTHING! YAY! Perfect pair of white jean for an awesome price. At least I won't cry when I spill spaghetti on them.
Joe's VS Forever 21


Doesn't she have the best style? DEFINITELY one of my biggest inspirations. There is SO much more I wish I could post, I guess I'll have to do a follow up!


Wednesday, May 11, 2016

Dollar Store Craft-DIY baby block decor...

When you're getting ready for your bundle of joy to arrive, every detail seems crucial! You wander stores aimlessly searching for that perfect SOMETHING that's going to be just perfect for your babies room. Unfortunately, I didn't have the luxury of having a nursery to decorate when I was expecting Olivia, since we had to move just DAYS after she was born. I still wanted something for her to come home to and I decorated a small corner in our living room just for her. I strategically placed her bassinet to have the best view of the beautiful California hills outside our window, where a herd of momma milk cows from the ranch across the street would walk by a few times a day because I thought "she would love that". Although she was never going to see it, when you're pregnant, you get a little crazy about things like this.

Well Olivia is 9 months old now and she still doesn't have a room but she still has a little corner to herself. I made these blocks as shelf decor and to double as baby shower decor. 


NOTE: THESE ARE NOT FOR YOUR BABY TO PLAY WITH!!! They'll probably take the stickers off in their mouths and also, I'm not sure how safe the paint is for teething babies who put everything in their mouths. I keep these on a shelf and away from Olivia. 

With that aside. These are SO fun and cute! I've definitely not been able to find anything anywhere that even comes close to being as cute as the DIY ones. The biggest bonus? They're SUPER inexpensive to make. 

You'll need:
      • Wooden Blocks-   $1.00 at Dollar Tree (had to make a few trips to find them)
      • Acrylic Paint-       $.95 on sale at Michaels (I have tons of them, so I just used what I had)
      • Lettered Stickers- $2.00 at Tuesday Morning. Also, just used what I had.
      • Sponge paint brushes- $.95 for a pack at Michaels
      • Something to contain the paint mess. I used a paper Trader Joe's bag. 

I didn't have the paint color I really wanted, so I mixed a few until I got the peachy pink I was looking for. After mixing the paint, I lined up all of the blocks and worked my way across, painting one side at a time and then going back to the first block and starting on a new side. I did a total of 4 coats (the original letters were pretty bright!). After they're dry, just choose a lettered sticker that fits your block best and spell out what you'd like! You can place letters on every side of the block or if you're like me and you get that pregnancy fatigue or just regular fatigue, just put the letters you want on one side of the block to spell out what you want. That's it! 


Tuesday, April 12, 2016

quick tip...

This is a quick and easy hack for repurposing those clear macaron inserts. Don't toss them out, clean them up and use them as makeup storage! They're perfect because they're clear, easy to tuck into a drawer or shelf, and best of all they are FREE!! After you buy (and eat) the macarons of course. Mine were delicious and from Savor Patisserie in Dallas. If you're even in town, check them out!


My new makeup storage in action. I love this because it's so easy to see what each color is without having to take out a hand full of shadows and spreading them out to find the right one.
Yes, I know I need to clean my eye shadows. I'm a messy person. 


Wednesday, April 6, 2016

diy flower balls...

This post is A LOT late. I made these flower balls for my baby shower and my daughter is now 8 months old. By the time I had some free time to post it,the holidays were here and then the idea kind of fizzled away since the window to purchase the materials is kind of small. It's now spring again and a good time to bring it out though! 

The idea for my baby shower was just a romantic rose, peachy, and gold scene. For the main dessert table I wanted a cluster of poufs and flowers. The initial idea for the flower balls came from this photo (I can't find the original source to save my life!)  love the way this photo makes you feel; the way the sun is shining and how warm and special it looks.


However, recreating them was not on my mind or agenda. I figured that even with Michaels coupons, the price of buying enough flowers just to make one would be way over anything I was willing to spend (which was no more than like $7 each). The idea actually clicked while browsing the dollar store isles. I was checking out the summer items that were just hitting the store and then...LEIS DUH! 

With two leis in hand I then set out to find what to stick em on to.The most inexpensive paper lantern in the appropriate size I was able to find at any store near me was the Spritz paper lanters they carry in the party isle at Target. I wanted to find one for a dollar but $3 isn't bad.  


After you have your materials, the rest is pretty self explanatory. Break open the lei and have at it with a glue gun. One good tip, have a medium to large bowl handy to set your ball on so it doesn't roll away. Took me a little while to figure that one out. Although it seems like it would take a long time to finish it, it really only took about 25 to 30 minutes. 


If you want a more lush, fulller ball, I'd say use 3 leis. I decided to make a second ball and used 3 leis and the results were beautiful but the one with 2 leis looked more like my inspiration picture. Also, I didn't add the drapey strands of petals that float from the bottom but those are as easy as just threading a few petals and tying them to the metal on the bottom opening of the balls. My baby shower date was incredibly windy, so that was just not going to work for me. 

I didn't get any good pictures of the balls during my baby shower, but I posted the best. Almost a year later the balls still look great! I pulled them out to show you the differences and a close up shot as well. These have endured 4 moves and a baby! 


The finished product and my baby shower! I really hope this inspires someone to make these! I'd love to see others interpretations of this diy!