Wednesday, May 20, 2015

A Little Baby Primping


We recently registered for our little Olive and due to space decided to go with the Contours Classique 3- in- 1 bassinet. We currently live in a spacey one bedroom but definitely not spacey enough for a full crib. Well, I was soooo excited when it arrived last week that I stayed up and decided to put it together all by myself. Not that I don't usually put furniture together on my own, but a little piece of me was telling me daddy and I should put it together as a couple. THAT little voice was quickly pushed aside by my impatient one. This is what the "stock bassinet" looked like...


Certainly not an adorable cozy place I'd like to set my first little baby into. Then, it came with these weird half frill things that didn't really do much to gussy it up. After putting those on it looked like...

Mmm...a little better but still kind of funky, right?

My style is very plain, simple, and classic. So it wasn't the colors that bothered me. I actually would rather have everything be very neutral so that I can save most items for baby #2. This however, was just not special looking at all. After a quick (haha...quick) Pinterest search of bassinets I scoured my home looking for anything I could use to spruce this guy up a bit. I found two king size pillow cases that we had never used or would ever use and got to pinning and sewing. I decided to use the existing bumper thing since it already had velcro attached and just sew it over the funky drop cloth half flap. I am SO happy with the way it turned out! 

Finished product! 

I cannot wait to place my little baby Olive into her little bassinet now! I am SO excited! I might just add a little mobile, but besides that I'd say this is EXACTLY what I envisioned. 

So, all I needed for this little makeover:
  • a little imagination
  • Some unused pillow cases
  • and a straight stitch on my sewing machine


Wednesday, March 11, 2015

Painted T-Shirts


I'm kind of at that pregnancy stage where my bump is showing but no one will ask me because I might just be a little pudgy in the middle. I'm five and a half months pregnant and just got back into the gym after breaking my toe. I take spin classes about 5-6 times a week and I felt a little funny going up to the instructors to let them know I'm pregnant (they tell you to do this on all these pregnancy websites), so I've been looking for some t-shirts with cute pregnancy designs aaaand...no. I'm not going to pay that much money for a t-shirt I'm gonna go get sweaty in. I don't even think I've paid that much more than a handful of times for a nice blouse, so no. That's bananas!

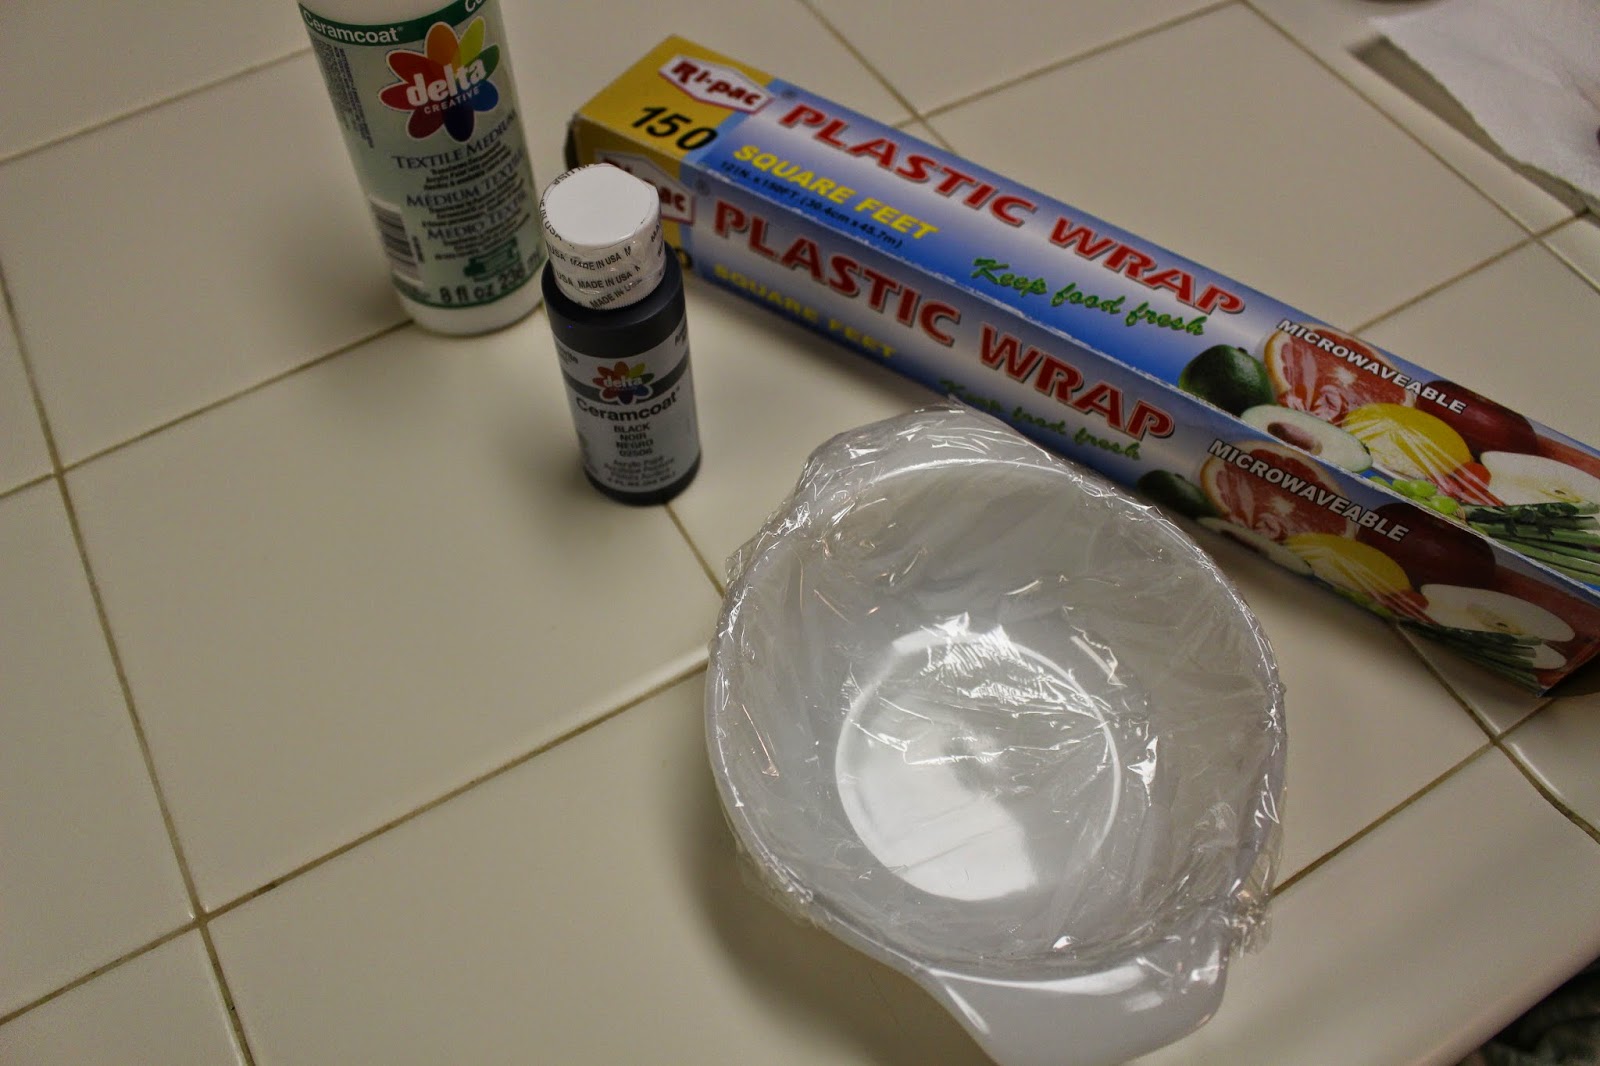
I was lucky enough to run across some CLEARANCE wohooo! Who doesn't love clearance? I found non maternity 1X sized t-shirts at Target for $3 a pop. I figure they're roomy enough to be comfy and long enough to cover the bump when it gets bigger. $3 a t-shirt? That's the kind of money I'll spend on a shirt I'm gonna get all sweaty in at the gym. I already had craft paint at home, so alls I needed was some fabric medium to mix it with.

Also, little tip... I get really lazy when it comes to clean up. So, if i'm using a non disposable bowl for painting, I like to cover it in plastic wrap and when I leave the paint in the bowl for a week cause I forgot about it I just remove the plastic wrap and toss it!


So I mixed my paint and textile medium and then I got my Silhouette out, chose my font and typed my word in. I like to use contact paper to do any kind of stencil. This is only because I have TONS of contact paper, however I have heard that freezer paper works very well for stencils as well.


Once I had my stencil cut out I placed a plain brown paper bag in the t-shirt to keep any paint from bleeding through.

I added my contact paper stencil. I didn't do a very good job of it, but it was late and I was tired and hey, I'm gonna be using this shirt at the gym anyways, right?


After the first layer of paint, I let it dry for about 30 minutes then added a second coat and allowed that to dry overnight. 


The placement of the word could have been better but I was too lazy to move the stencil and it's going to be my gym shirt anyways. I'm really happy with the results and after a few washings the lettering still looks great!


Friday, March 6, 2015

My DIY Gender Announcement


This is my first pregnancy and like most mommies out there, I am trying to document every part of it as best I can. However...I am also a cheapo! I hate paying full price for anything and wait for sales at any chance I get. This usually is true for services as well. I am absolutely in love with all of these gender announcements I see all over the place, but I just CANNOT afford to pay a photographer for every single milestone I want to capture. I'd rather save a little money so that I can get that photographer once my little one has arrived. So when my honey and I found out what we were having I was extremely anxious to announce it in a unique way and without breaking the bank.

I searched Pinterest for ideas and was inspired by this photograph. How stinking cute are they?


Just my luck, I found out I was having a girl on February 19th. So  a few days later I hit the Target Valentines Day clearance isle looking for some pink candy. It didn't even have to be cotton candy, but just my luck...a bucket on pink cotton candy for $.99! I scored some pink tissue paper and after work I rushed home, opened up all the blinds in my living room to get in as much light as possible, pulled the comforter off my bed and laid it in front of a bare wall, made a quick cone out of copy paper for my cotton candy and a tissue paper pouff. I was in my casual Friday work outfit, so the T-Shirt worked out perfectly.

And here's my finished product.


I could have probably cleaned up the edges a bit and done a little editing, BUT I'm pregnant and lazy and they look pretty gosh darn good. My baby daddy is wasting his time on his Electrical Engineering degree. I think he's found his true calling in photography. I love the way they came out and I only spent $2. OBVIOUSLY, photographers are AMAZING and I am not attempting to put down their craft at all, but for when you just can't afford it and still want to capture precious memories at home, no one is stopping you from getting a little creative! 


Sunday, February 8, 2015

To all the mamas out there...you're AMAZING!


I'm usually working on a few projects at a time, but since this little bun started baking I am running on empty. Not only does this little guy (or girl) suck up all my energy but the energy I do have is taken up by the fact that I'm limping around everywhere because of my broken toe.


 Oh, did I mention how much clumsier I've been too? Well, clumsy enough to break my toe good enough to have to have a pin drilled in there. And when you're pregnant you are lucky enough to be awake for the entire procedure! I might have never known what the inside of an operating room looks like otherwise. OR gotten to experience the feeling of a drill penetrating your bone...long lasting memories.(Did you catch a little sarcasm there?)

Big ups to all the mamas out there getting everything done even when you're just not feeling it because for me, getting dressed for work in the morning is an accomplishment right now!

Sunday, September 22, 2013

DIY "Lucite" Tray

I have been out of the game for a while, but with a new apartment, a new city and what feels like a new life, I'm more inspired than ever!

I need to decorate and set the details for the new apartment and I'm starting with my DIY version of the ZGallerie gold and white Lucite tray. I've searched high and low and have not been able to find it for purchase. I am OBSESSED with it! Naturally, since I can't purchase it, my little crafty brain goes "CHALLENGE ACCEPTED!".

My obsession:

1. I got myself to Michael's and purchased this acrylic picture frame for $14.99. Of course I saved my 50% off coupon for this. So these frames are pretty much just a hollow plastic shell, which makes them PERFECT to use as a tray. You just turn them around, and VOILA!

2. Cover the outside of your tray with contact paper. You know, the stuff you use to line your kitchen shelving. You want to make sure you work with the outside of the tray so that when you turn it around after it is painted you have a nice, glossy, protected surface. Make sure to work out all of the bubbles. Then you measure and mark your frame at every 1" all the way around. I also drew a line a bit off center straight down the frame and marked it at every 1". Then, you begin connecting your marks!
3. Once it is all mapped out, carefully cut out your lines using your x-acto knife. You want to make sure to leave exposed what will be the gold pattern in your tray.

 4.  Once your pattern is mapped out, you want to make sure you tape your edges. I forgot to mention that I did not remove the insert from the frame until I was done. I did this to protect the inside from any excess paint over spray.

5. SPRAY AWAY! I used a satin finish gold metallic spray paint. It is NOT specified for plastic, but it has worked out JUST FINE! I did about 5 very thin layers, allowing about 10 minutes of dry time in between.
6. Once you've gotten the right amount of coverage from your gold spray paint and allowed to dry, go ahead and peel off your contact paper. DO NOT remove the blue edging.
7.  After this you're ready to spray on your white layer. I also did about five layers of white, with 10 minutes of drying time in between. I used Krylon spray paint in Satin finish.
8. Peel off the protective edging tape and take out the cardboard insert it came in. VOILA! I'm in love!
After about a week of using the tray I haven't run into any hiccups. I did, however, go back and add a few layers of Krylon Acrylic Crystal Clear to protect from minor scratches.
Looks amazing with my other obsession... my Birchbox!!

Sunday, September 12, 2010

Pallets Furniture

I have been so inspired by some posts I've been seeing about pallet furniture that I've decided to give it a go! It's actually one of my 10 things to this summer and I'm so proud to have done it!! I got some freebie pallets from my work and then we went at it with the power tools and paint!!


The finished result! A pretty white bench with a planter box.


I'm in love with it! Too bad I haven't really gotten a chance to enjoy it since we haven't really had a summer this year. Ohh, also I have one more pallet to turn into a little coffee table! I love it!

Saturday, March 27, 2010

Thrifty Find

Recently I've been running into these vintage beverage carts all over, while browsing the blogs or while flipping through the pages of old Country Living Magazines. Everytime one pops up I can't help but stop and drool over them. They are just so charming and glamorous. So, while on my weekend thrift store raids my husband calls me over and right infront of him was this beautiful vintage beverage cart! I instantly dropped everything in my arms and fell in love! Hubby got it for me as an early birthday gift! It's a bit rusty but overall in good shape. I'm really looking forward to getting it back into good shape in time for my birthday dinner, so I guess I've got my work cut out!

In the meanwhile, I'll be on the look out for some inspiration...

Wednesday, January 6, 2010

Charmed

Christmas gifts this year? WINE CHARMS!


They came out pretty darn good for my first try, don't ya think?

& I can't give the picture credit to my new gift...these were taken with my sister in-law's. =) So now I've gotta figure out how to do this with mine!

First, get your hands on some earring hoops. They're a few bucks at the craft stores.


Then just slip a bead of your choice in and bend the edge of the hoop with your wires to secure it to pre-made loop at the end of the hoop.


and you're done! I made all of these in minutes!

Monday, December 7, 2009

Holiday Boutique...

My sister in law hosted a Holiday Boutique this weekend. I wish I had a camera! I would have gone around taking pictures of all of the fabulous ladies who were there and their booths. Oh well...here are a few pictures I took with my husbands phone!


So here are my creations! Magnets, wine chars, upcycled jewelry, a few headbands, and some boxy pouches!


Cute, right? They're like two inches tall!


& a wine charm!

I really wish I had a camera so I could have taken better pictures of my work as well as pictures of the other products. = ( oh well...maybe Santa will bring one?


Sunday, November 8, 2009

Afternoon Project


This was such an easy and fast project that I can't believe I've been putting it off for so long! I'm really happy with the results! To make this for yourself:


1. Measure and tape a 1/2" border on your frames. You can really use any size frames. I've had these for about 5 years and just didn't know what to do with them.


2. Now you want to take your acrylic paint and a sponge and paint two to three coats along the edges. This is where you can really get creative with the colors! I chose black because that's the theme we've got going in our hallway and I thought it'd look good with the decal. Wait about thirty minutes to an hour to dry.

*Note: I used acrylic paint so I can easily wash the paint off if I ever want to change it up and use the frames for something different. But you could probably use any kind of paint you'd like.


3. What you do now is cut out paper for the background (any kind really, I used white wrapping paper) the size of your frames and stick your decals on the paper. If you wanna go for the effect that we went with , separating the image onto different frames; remember to leave a 1/2" space on the continuing paper background for the border we've painted on.
4. Then just place the glass PAINT SIDE DOWN on your artwork and clip it closed!
Ta Da!!


What do you think?